Search Results for: 시험준비에 가장 좋은 D-AX-RH-A-00 시험패스 덤프공부자료 최신 덤프자료 🐴 ⏩ www.itdumpskr.com ⏪에서➠ D-AX-RH-A-00 🠰를 검색하고 무료 다운로드 받기D-AX-RH-A-00시험대비 최신버전 자료

Nancy to Rose

Nancy to Rose

This is Nancy. When they say “pretty as a picture”, they mean it because she did look pretty. Then the old adage that a picture is worth a thousand words, well, we have a lot of words for Nancy and it’s more than a thousand and they aren’t pretty. The first picture below is what they used to get her to sell, looked pretty good, huh!

After removing screw, self tapping screws, mails and bolts from this thing and taking down to practically absolutely nothing, we are going to rename her Rose. The ones who owned her before us did not know the difference between a bolt, a screw, a self tapping screw, sheet metal screw, wood screw, staple or nail.

I will not even go into the amount of spray foam and caulking we need to remove from her just to get her squared up and back together. We removed everything inside, took out the windows, ran wires, added lights, electrical outlets and cleaned her up. She’ll be quite nice when we get finished. Keep checking on the progress here. I’ll keep updating the page as we go.

I’m not great at this blogging thing, so I am sure there might be a better way to post progress, but I want it to go along on one page so this is the only way I know how to do it.


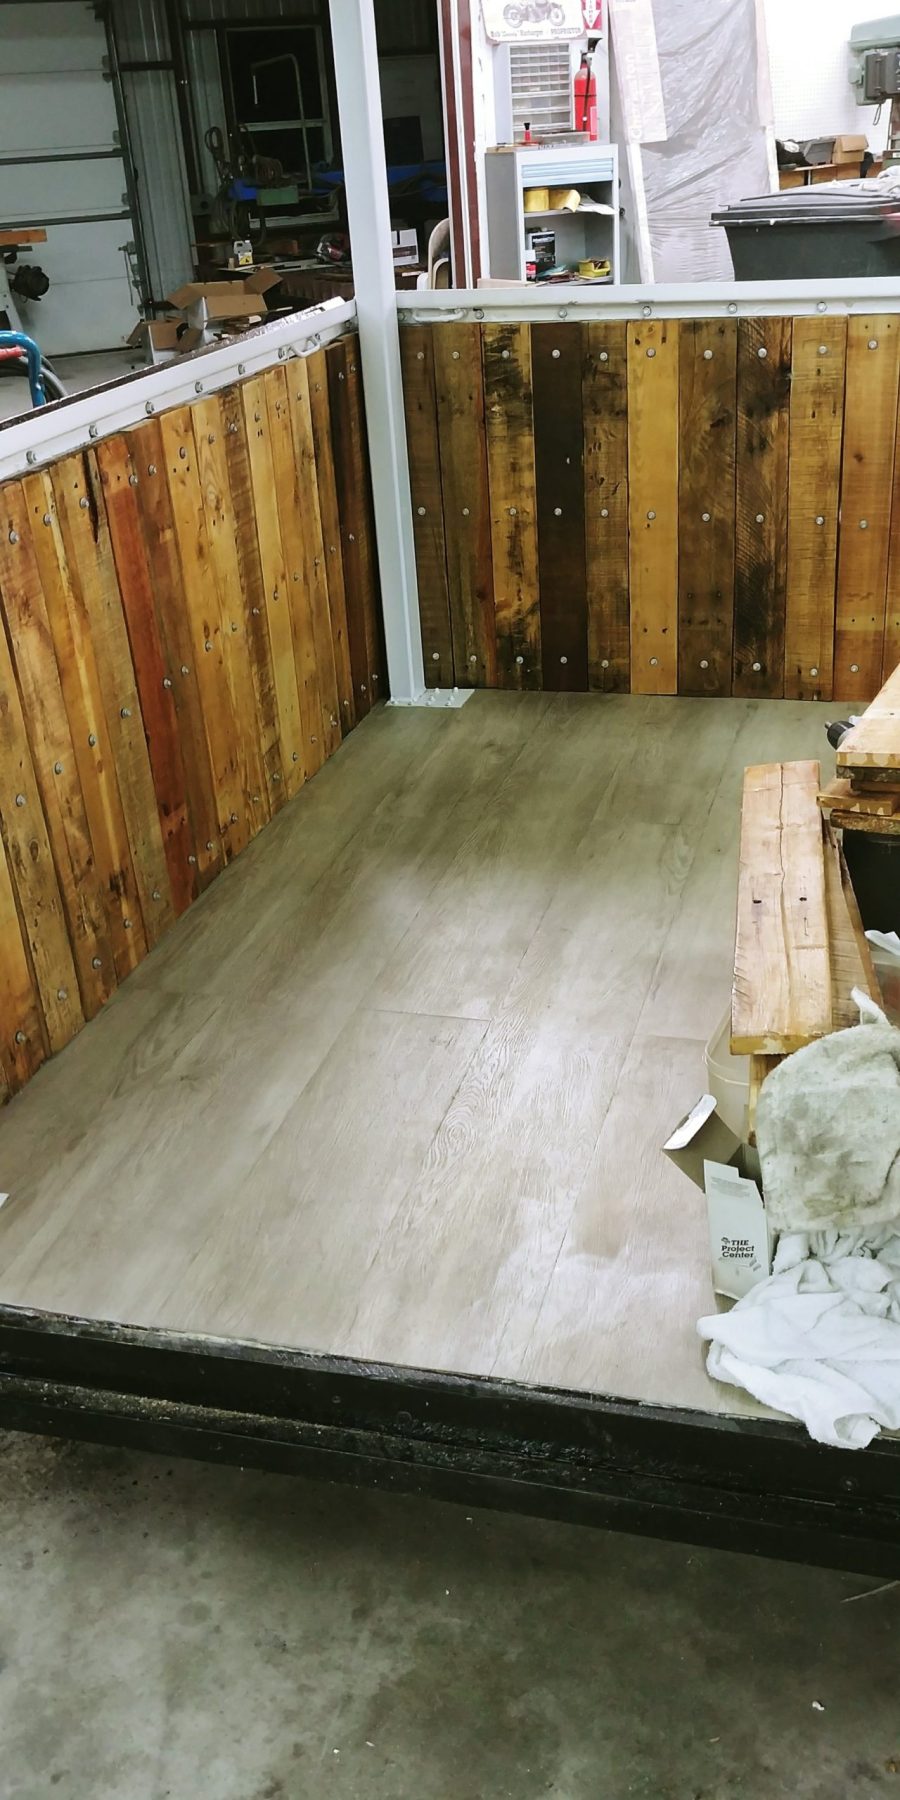
All the wood had to be removed from the inside, I’m bad at remembering to take progress pictures. But, on the other hand, it was so ugly and horrible I just went in there and started ripping out everything before I thought about taking a picture.

They tried to cover the walls and ceilings with nice wood, but painted half of it and left the rest unfinished. They overlapped and pieced it in all over the place, nothing made sense. Wood going this way side to side, then the next piece went top to bottom, yikes. Painted over here, not painted over there, seams looked like a second grader cut them. Nothing fit properly and wood screws here and sheet metal screws over there and bolts over here, what a nightmare.

Not to mention the nightmare of the spray foam. I get what the person was trying to do, but if you’ve ever used this stuff……O. M. Goodness, once you spray it, it expands and it expands fast. If something is loose or there is a weak spot, that foam is going to find it’s way over there and make things bulge out and not fit properly. that being said, the walls were not flat, the ceiling was not smooth, nothing fit due to foam expanse in places where it sin’t need to be. You can see in the 2nd picture below how it was everywhere. I had to cut it off and dig it out, just so we could get the metal sheeting on the framing to press down flat. Inside was even worse, we cut and dug that stuff out for days and I am not kidding you. We probably filled two 90 gallon trash cans of that stuff to haul away.

Here is a quick video shortly after we got her home and into the shop to really take a good look at her.  Like I said, “pretty as a picture”.

Trailer Turned Beverage Bar

Trailer Turned Beverage Bar

A cute little project completed during the shelter in place…………..  It’s almost done, we just need to add some leather straps on both ends of the doors, which I intend to make with some leather belts from Goodwill.  The straps are actually going to be used to hold the doors up at a high top level if you wanted to use them as a shelf or serving top.  I just have to wait until they open, they are closed right now due to the COVID thing.  Then we need to purchase some galvinized tubs to set on the inside to hold ice, then this will be ready to hold ice that you can set any type of beverage in, bottle, cans, maybe even a keg.  Not sure yet, but we will find out when we get the tubs.

I will be posting a final finish on this once we get those last 2 things done.  I am hoping to rent it out as a mobile beverage trailer to keep cold drinks to be served at parties, receptions, reunions, company picnics, etc. 

This was a project completed during the Shelter in place, watch us transform this tiny thing, so small I couldn’t stand up in it.  I’m 5’3″ and inside top to bottom was 5′ so it was VERY inconvenient.  Hmmmm…..gets me to thinking, what to do, what to do. So being that my husband has spent 40 plus years in a welding and fabrication shop I ask him if this can be renovated some how and lifted to I can stand inside, and one thing led to another. I got my brain going and noticed there are bolts all around the center of this fiberglass enclosure, so what do you think this gal did?  Yep, grabbed a socket and started loosening them.

So I ended up with this…………..

Now I’m really starting to think about the possibility here.  What could I turn this thing into?? Possibilities are limitless when, like I said you have a husband with the shop.  The shop with all the tools.  The shop that can do anything.  The shop with endless possibilities and a man with the ability to do anything with metal, well, then of course my brain and ideas! So, I begin to look around through his scrap and see what I can find…………

I’m a bit of a scavenger in the area I live so I am always looking for used stuff, things I can up-cycle, re-use or re-purpose.  So I’m thinking I can get this done quite inexpensively.  I start asking for wood, old flooring, used cabinets, old pallets for free or cheap.  I might add I got pretty much all the things for free!  YAY, I always say free is better. So first I collected free pallets and took them apart. Taking apart pallets isn’t quite as easy as I thought and you get a lot of wasted if they are too old.  Newer one are better because they come apart without splitting and breaking up the wood. I decided I am going to line the lower section with old reclaimed pallet wood.

And when I say my husband can do just about anything, i’ll just put this video here, not that is such a fancy thing because anyone can heat metal and bend it, but you know. When he needs something done and he can’t find it he will make it.  He was making this for one of his projects.

Now to get back to my project.

I got some vinyl planks for the flooring for free as well, yippee.  Some one was remodeling their place so I took cabintes and flooring they offered me for free so they wouldn’t need to get a dumpster.

It wasn’t all that hard to install with a bit of floor adhesive and my patience I was able to get it fitted pretty quickly.

I’m thinking, no matter what this ends up to be used for, it may need to have some electrical outlets, just in case. So, yes, I do know how to do that as well.

By the way, mu husband has done quite a bit of painting in his lifetime, he’s 75 now.  I think I could let him paint this for me. But what am I going to do for the roof, what about the side openings? What about some doors for the back, the old doors were made to fit the 4 ft opening, could I put those back on?  Then what do I do about the space we will have left due to the height adjustment…………..

I found this old ford door on the local Marketplace and after a bit of this Rust Kutter I was able to get it looking pretty good.  I paid $250 for it, but it was cheaper than some others I had located around here. 

Wouldn’t you know, I thought it would need to be modified or even welded by my husband to make it fit.  But, it fit just right!

I think it turned out pretty good if you ask me!

I had 3 old doors I got from a local lady.  She had taken them out of the county courthouse and they were over 100 years old.  I measured them, and after cutting about 4 inches off the length they fit perfectly in the center side openings.  Who would have though.  I paid $50 for the 3 doors and only using 2, so okay, sounds like a plan.

Well, over 100 years and about 100 coats of paint to remove because I wanted them stained.  Boy did that take a few days, and a lot of stripping and a lot of back breaking work.  But I have patience.  I knew the outcome would be worth it. My husband had an old piece of piano hinge laying around too! 

We had to fit them up before the paint to make sure all was good.  They actually fir pretty well for the first try.

Lots of work and lots of ugly fumes and if you know me, I am the biggest fan of non toxic everything!  This was one part I did not like, but I had to do it.  Ugly, stinky fumes for days.  Good thing my husbands shop is open and airy, I was able to do it near a big 16 foot roll up door, so the fumes weren’t too bad.

Good thing my husband has a shop with lots of fun tools!  I learned to use this sanding disc and an air compressor.

After staining and applying an outdoor urethane, we put them on.  Attached a couple of rubber bumpers to the fender so that when they are down, they don’t get beat up.

My husband made a nice holder for the electrical cord.  We painted the trim and hitch a nice glossy black.

I splurged on some baby moons!  I love these, I think it added a little extra touch.  But now I really had a dilemma trying to figure out what to do for the roof.  I wanted a western feel to the whole thing.  So, well my husband said he could build me an a frame roof that I could cover with some of my pallet wood.

This is what he made and I attached my wood to it.  Then I had a friend I knew had some old rusted corrugated tine which would be perfect for the roof.

I can’t say enough about how I couldn’t have done this without my hubs and all his tools and equipment.  We lifted and set the roof on with his forklift.  Worked like a charm!

We had an opening on the front now that just didn’t seem right.  So I went through some old cabinet doors a guy had given me and found one that fit perfectly.  I painted it in the center with black chalk paint so a person could write a message or use it for a menu or something.  It has hinges so it can open and closes with a regular cabinet latch.

Beverage Trailer Renovation Part 2

Beverage Trailer Renovation Part 2

So we added a few things like a set of baby moons. I want to paint the wheels white, I think that will show up better. We need to get the galvanized tubs and will probably need to make stands for them. When that’s done I’ll do a final post.

Since we added plugs we are considering setting a generator on the tounge and this will plug in. If we are at a venue that had an outlet nearby, we can just plug into any 110 outlet. I took a cabinet door from a set I rounded up from someone who was redoing their kitchen. I did a chalkboard finish so we could add a menu or use it for an announcement board. It actually opens as well if you need so air or just to add an open feel.

The baby moons, soon well paint the wheels white.
Had to add tail lights, now we need to get it registered.
Beverage Trailer Renovation

Beverage Trailer Renovation

I’m bad at going in order with my photos, but I’ll try my best. I usually don’t sit down to post until the job is already completed, oh well.

We started with a tiny $200 enlisted trailer that want even 5 ft tall inside. After several bumps on the head a asked my husband if the roof could be raised and well………

The original beast

I originally intended to use this trailer at vendor and market events formy essential oil business. Like I said you couldn’t stand up in the thing, we kept bumping our heads putting things in and out of it. As you can see in the pictures there were bolted rivets right in the middle and all the way around. I started removing them……..

Bolts removed and we took off the top half.

Then I started thinking this could be something…………….I envisioned an ice cold beverage trailer. My idea came after I saw an add for the Pour Horse Bar. You can see it at www.thepourhorse.com and it’s kind of like this..

I put that in there so you can see where my idea is going. I’m not going to do coffee, I just see a cold beverage unit. Galvanized tubs filled with ice to hold your own beverages, soda, beer, wine, even kegs. Whatever you want to Pitt in it for your guests is your business, we just provide the ice!

Birthday, reunion, bachelorette party, family gathering, the event ideas are unlimited. So how am I going to put this together? My husband’s a welder by trade so 4 steel posts and let’s raise the roof!

Then I had a pair of 100 year old doors I got very cheap. They used to be in the Karnes County Courthouse. They had several cigars of paint on them that needed to be removed first. We needed to make sure they would fit first. My husband had an old piece of piano hinge, so here we go.

Perfect fit, just needed to take about 4 inches off the bottom.

Now to take them off and get rid of lots of paint. I wanted them stained. Boy, that was days and days of stripping and sanding.

Chemical process of paint removal.
Sanding
They turned out quite well, stained and coated with outdoor poly.

I found an old Ford door on facebook and it was a rusty old thing. A bit of rusty removal and paint. It fit perfectly!

Primed for paint

I decided we might have a need for electrical plugs. Maybe for lights or a margarita machine or two!

My husband is good at painting and well, he has all the stuff to do it and we had white paint.

I had an idea for a roof, a little rustic, rusty metal and wood, and an a-frame style.

Then it was time to put the roof on. Went smoothly, we had to add a bit of trim and a soffit to finish out off. Then on to complete the inside with a floor I got for free and wood siding I got for free as well. Most of the wood forThis project was free from some pallets I took apart so I can’t complain. The floor was from a lady renovating her bedroom and she have me her oldstuff. It was nice, really heavy duty vinyl wood look planks.

Jan 3, Update

Why oh why did they use so much caulking. We sepent hours scraping and grinding and spraying on paint removers to try to soften up all the stuff. Rolled up the siding to fix and straighten up the flooring. The flooring was put down using 1/2 plywood, a nice sanded type too, however, they didn't square up the front so it made the back out of square. Of course we already squared up the front, now just to square up the back and we can seal her up again.


You can also see that the flooring was sticking out way past the side framing. this had to be cut of and squared up. We had to do the same to the front left corner of the trailer as well, it was way out of square. All the caulking was overkill on this little baby because there was plenty of butyl tape applied before these moldings were tightened down.  Now we need to scrape all of that off as well and get a new roll.  But, we expected that.


Now that is a much better fit! A little bit of grinding to straighten things up and we are about ready to strip all this molding and put it back on. First we need to address all the little holes covered by tape all over the darn thing.  I guess they thought tape would be a good fix, however it did nothing but cause us a headache. It wasn’t just taped, but a coating of roof patch was laid under all the tape, that stuff is a mess to try to get off.


That ugly spot right there is where they had put some of the roof patch and covered with a 4 inch wide tape. It was crazy trying to get that tape off, why they did this we don’t know. They taped up every seam.


Then  there  are  all  these  holes.  Holes  where  they  just  decided  to  poke  some  type  of  sharp  instrument  in  the  siding  to  make  way  for a  wire  or  something.

This is what it looked like inside when we had the back sheet of siding rolled up. Well, things are coming along, let’s just say, slowly, but steady wins the race correct? After much discussion we have decided to just gut the old gal, remove all the windows, and mouldings, get rid of all of the caulking that goes on forever and ever and put her back together.  We will be putting on a new coat of paint and probably painting the inside white. 

So, you can see a bit of the inside here. They did do a good job of insulating with 2″ foam board. However, they sprayed expanding foam into every nook and cranny they found, again overkill, like the caulking.  A lot of the expanding foam cause more harm than good. It spread out siding in places it didn’t need to be pushed out, made things move out of square, made the door severely out of being level so much that it rubbed on the bottom and had a 2 inch gap at the top. Thankfully we were able to straighten that out after we scraped out a majority of the spray foam.  That stuff is good when used properly, but you can’t spray endlessly into cracks and crevices because that stuff travels and will push out anything loose or improperly fitted.

Vintage Camper Transformation

Vintage Camper Transformation

December 2019 we picked up a vintage camper they called “Nancy” I figure it’s common to name your vintage RV, however, I’m not a fan of Nancy and here’s why…………..

Nancy looked real fine and pretty in the picture, but you know the old saying….pretty as a picture or something like that. Here’s the picture I’m talking about.


This was “Nancy” when we picked her up.

Now, I know some of you may be thinking, the old girl doesn’t look so bad. But again, let me remind you, this was a picture, taken at a good angle I might add because truthfully well……………………

Now who tapes up over stuff and then paints over the tape???? Seriously, taping over small holes and dents then slapping on a coat of paint is like putting lipstick on a pig. Trying to get screws off of molding that has been covered with caulking and paint is difficult to say the least. This is just a few of the things we had to deal with.  Watch the next video to see more hilarious caulk talk, LOL

This is the inside as I started to demo. I am probably going to praise my Ryobi battery charged drill the entire time we work on this project. This drill is a beast and I didn’t need to recharge the battery after a good 9 hours of removing screw after screw to take out all the stuff on the inside. I didn’t experience any slow down or loss of power from the first screw to the last. And there are hundreds more to go. Who ever tried to fix this camper up didn’t know the difference between a wood screw, sheetmetal screw or a sheetrock screw. There are screws of all sizes and lengths as well as colors. Black screws, brown screws, and stainless. No rhyme or reason except for the fact that the person or persons responsible for the building must have thought if one screw holds then 2 will hold even better.

We plan to try to take her back to the good old vintage time, with a few modern additions like a water tank with pump and a mini on demand hot water faucet. We are not going to add any propane appliances however we are going to go fully electric with a few plugs, a double hot plate, toaster oven, mini fridge and coffer maker.

For dining and sleeping we are planning a U shaped sofa/dining unit that converts to a bed and an overhead fold up bunk. Under the sofa will be a few storage cubbies, a small floor to ceiling closet will be added as well as new flooring. As for the walls, I plan to try my best to remove the little bit of paint that they started to put on the beautiful brand new birch sheeting and do a full honey stain inside. I’ll try my best and if no, we may need to paint the whole dang thing white. I sure hope not, wish me luck! Stay tuned for updates here.


What every woman needs to know about FOLATE and FOLIC ACID

What every woman needs to know about FOLATE and FOLIC ACID

Pregnant or thinking of becoming pregnant?? What you need to know about FOLATE and FOLIC ACID

Things you should know! First of all I am not a Doctor nor do I proclaim to be providing any medical advice.  What I am going to explain is purely information I have found while using GOOGLE. I highly suggest that you look it up for yourself and do your own research into FOLATE or it’s synthetically produced counterpart FOLIC ACID.  FOLATE, is purely Vitamin B9, and a very important nutrient needed in our diets, especially pregnant or wanting to be pregnant women.  Vitamin B9 is found in leafy greens, broccoli, and dried legumes such as beans and lentils.  This key nutrient is used by our body to make DNA and other genetic material, produce new cells, and support nervous and immune system functions.  DID YOU SEE THAT? Make DNA?? so that is why this is so important during pregnancy?  I don’t know, but makes sense to me.

However, do your research and always ask your doctor, practitioner or midwife before taking any supplements or dietary nutrition.


Why you wouldn’t choose FOLIC ACID

Folic acid is the synthetically derived vitamin from the whole food form of FOLATE.  FOLIC ACID is not natural and does not naturally exist in nature.  Like I mentioned previously FOLATE is Vitamin B9, remember that.  Research has determined that synthetics, like FOLIC ACID, can be metabolized in the liver.  However overtime the liver cannot synthesize FOLIC ACID, especially in high concentrations.  This obviously can cause stress on our liver, right?  Are you still with me here?

Pregnant women or looking to become pregnant are always advised to increase their intake of naturally-occurring FOLATE by consuming more dark leafy greens, broccoli, spinach, dried legumes and lentils.  Another way is by taking the synthetic FOLIC ACID.

Here’s an easy way to get good, food sourced FOLATE

You can juice or eat a lot of leafy greens as well as eat a lot of dried legumes and lentils.  Or may I make a suggestion here?  Did you know that Young Living has a couple of products that already contain FOLATE and are infused with essential oils and packed with other great vitamins and other good for you stuff?  Look at the ingredient list of Young Livings Balance Complete:


This would be a great addition to anyone’s daily healthy nutrition regimen, I mean look at all that great stuff in there!  The taste is great too, because I think it tastes like vanilla cake mix, or raw cookie dough flavor.  And did you notice that FOLATE is listed at 33%, you can’t beat that right?  Oh but you can, and look at Young Living’s Super B product!


There you go, 100% of the DV of  FOLATE right there along with a whole butt load of other good for you stuff!  There, I finally posted this.  I’ve been mulling it around for quite a while and felt it was time to finally get the info out there.

and if you want to look it up for yourself, which you should for your own peace of mind, here is a link because ya’ know, like I said I am not a Doctor.  Another good thing to point out is that we ALL need to become informed, knowledge is wonderful! here is another good link from the Mayo Clinic.

Quit relying on everyone else to give their opinion on things, even Doctors only know what they know, and what they don’t know might be helpful for you and worth finding out.  In the past I have heard of one doctor saying one thing and another saying the opposite, so you know what?  Do some research.  I hope this helped you out!

If you want to purchase your Young Living products so you can get your FOLATE naturally, please reach out to me so I can be of help.  Here’s my email: [email protected] or if you just want to head on over and place an order you can go to my link here , however I’d really like to make a suggestion to become a member so you can get the wholesale price, there’s no cost to join.  I can help you with that, and get you on our Essential Rewards program called ER so you can get your Balance Complete and Super B coming every month.  We all know when you are pregnant or thinking of becoming pregnant you can get busy and very overwhelmed with life, so our ER program is a perfect way to make sure you get your FOLATE while you need it.  You can cancel it at any time, but, here’s a little secret…………while you are on the ER program you will be earning reward points so you can get free product!  Yep you read that right, FREE PRODUCT every month!

Let me show you how you can end up with with one or both of these GIFT BUNDLES for free!

To find out more about the Young Living SEEDLINGS line for babies and infants you can click this link

Young Living is proud to be the leader of essential oil infused products.  With the “SEED TO SEAL GUARANTEE” you can rest assured these products are free from dirty, nasty toxins.  Start your baby out right by choosing natural, plant based and toxic free products that you’ll enjoy as well!

As they grow, there is an entire line of products just for kids called Kidscents!  I will post soon about the Seedlings and Kidscents products so you can learn more.


Hi, this is Rosalie and if you don’t know me, I’ve been married over 35 years, raised my kids and now enjoying my grand children.  I love God, the Creator,  and started my healthy journey several years ago because I wanted to live my life and take control of my health and healing naturally, God’s way.

I’m an advocate for healing the body through, prayer, trust in God, upright good living, good wholesome food and proper nutrition.  Boosting the immune system and ridding your home of nasty toxins is a HUGE key to a healthy lifestyle.  I believe living God’s way, living healthier and eating the proper foods and practicing good nutrition is all you need to maintain a healthy weight, a healthy body, as well as having that balanced mind and emotions we all need in this chaotic world we live in.  Having a strong spiritual connection with God the Creator as my guide has opened up an entire study of what it means to keep our temple(aka our BODY) clean.

I’ve done a lot of study about living God’s way and what it means to take care of our temple(our body).  Weather you have just started, been going at it for a long time or maybe on the fence and don’t know how to start clean living, I am here to help and guide you through your journey.

Health and Wellness Coach – Certified with The Integrative Wellness Academy in 2015

Aromatherapist –  Certified with New York Institute of Aromatic Studies


Italian dinner decor

Planning a spaghetti dinner? Here is what I did for an Italian dinner. Under is a red/white check basket liner from Party City. It’s in the summer decor. Empty cans of tomato sauce were repurposed as a pot to hold fresh basil, parsley, oregano and rosemary. The room smells herbaceous! Added a few sunflowers for color. I collected empty and full olive oil and balsamic vinegar to set out with them. Didn’t take much time our money for this theme. I’ll re-plant all the herbs in my garden after the dinner is over.