Search Results for: N10-008参考書 ↩ N10-008模擬試験問題集 🍏 N10-008真実試験 ⏯ ➠ N10-008 🠰を無料でダウンロード⏩ www.goshiken.com ⏪で検索するだけN10-008赤本勉強

Favorite Lip Balm

This is my most favorite, favorite lip balm and I like it better than that Bees brand, which used to be my favorite.  This is about 1/3 of the price and everyone I give a lip balm to is hooked.

Peppermint Lip Balm

1 Tbl raw unrefined shea butter (like this)

1 Tbl virgin organic cold pressed coconut oil (like this)

2 Tbl beeswax pellets (like these) or go to your local honey farmer and ask to buy their beeswax.  I get mine here at Austin Honey Co in a 1 lb block and I grate some of the block and pack pretty firmly into 2 Tbl.

Essential oils  15 drops for peppermint lip balm

INSTRUCTIONS

Melt everything except the essential oils in a double boiler or in a pot setting in another pt of boiling water on medium.  Let it cool for about 5 minutes and then add 15 drops peppermint essential oil (I only use these)


Honey Orange Lip Balm – Lavender Orange Lip Balm


These two are my second favorites after the Peppermint lip balm,  I like it better than that Bees brand, which used to be my favorite.  This is about 1/3 of the price and everyone I give a lip balm too is hooked.

Honey Orange Lip Balm or Honey Lavender Lip Balm

1 Tbl raw unrefined shea butter (like this)

2 Tbl virgin organic cold pressed coconut oil (like this)

1 1/2 Tbl beeswax pellets (like these) or go to your local honey farmer and ask to buy their beeswax.  I get mine here at Austin Honey Co in a 1 lb block and I grate some of the block and pack pretty firmly into 2 Tbl.

1 tsp sweet almond oil

1 tsp raw organic honey I get mine form the Austin Honey Co it would be nice if you have a local honey farmer you can support

Beeswax

Essential oils  15 drops orange or lavender depending on your preference

INSTRUCTIONS

Melt everything except the essential oils in a double boiler or in a pot setting in another pt of boiling water on medium.  Let it cool for about 5 minutes and then add 15 drops orange essential oil (I only use these)

Luxurious Mango Massage Lotion

Luxurious Mango Massage Lotion

This is a GREAT massage lotion!  After trying several and having a lot of fails, I happened to come across this one trying to make a body butter and it was way too soft and thin, so I used it as a massage lotion and LOVED IT!

I mix equal parts of the following:

Shea butter and I use this on AMAZON, Mango Butter(raw and unrefined like this one) , Coconut oil, virgin organic cold pressed (I use this one), Jojoba oil (like this one that I use) I find it easy to use 1/2 cup of each of the above and then I add 1 tsp of vitamin E oil (I use this one) as a preservative against mold.  If you want to double it feel free, I often double this when I am making a huge batch so I can give away as gifts.

If you like a written recipe, here you go:

1/2 Cup raw unrefined Shea butter

1/2 Cup raw unrefined Mango butter

1/2 Cup virgin cold pressed virgin Coconut oil

1 tsp vitamin E oil

10-30 drops of essential oil (I only use these because I trust the purity)

INSTRUCTIONS

  • Combine all the butters and oils, except essential oils into a double boiler or a pan set inside of another pan of boiling water on medium heat until all oils are melted.
  • Remove from heat and let cool slightly.
  • Move to the refrigerator and let cool about another hour, until beginning to harden, but remain somewhat soft.
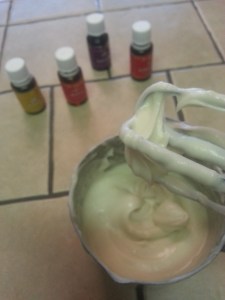
  • Use a hand mixer, add essential oils, and whip about 10 minutes.  Depending on the temperature and where you live it make stiffen slightly or remain a thick lotion.  But I love it for massage or even an after shower body lotion.
  • I prefer to store in metal or glass containers with a pump top.   If your home is warmer or very humid it may soften a bit more, but it is still good.


Instant Pot Beef Barley Soup

Instant Pot Beef Barley Soup

A classic beef barley soup is a great wintertime meal, but, unless you have all day to prepare and cook it then you may not have the pleasure of enjoying it often.  I happen to love my pressure pot, which allows you to make this delicious flavorful meal in about an hour.

What you’ll nee:

2 pound beef chuck cut into 1 1/2 inch strips, 2 lbs boneless short ribs or 3 lbs bone in short ribs.

Sea salt and fresh ground peppers

1 Tbl tomato paste

2 Tbl olive oil

4 Large carrots, diced

1 large sweet yellow onion, diced

3 celery ribs, diced

4 medium garlic cloves, sliced

1 cup red wine

2 quarts chicken or beef stock

2 sprigs thyme

1 bay leaf

1 cup pearl barley

Season beef with salt and pepper and brown well on all sides in the pressure pot, about 5 minutes, remove and set aside.

Add carrots, celery, onion and garlic and saute in pressure pot, set aside.

Add 1 Tbl olive oil and tomato paste, scrape up any brown bits from the bottom, now add the red wine.


Add the stock, barley, thyme and bay leaf to the pot, add the beef.  Lock pressure lid and cook on high pressure for 20 minutes, release pressure.  Add vegetables, stir in and replace lid and cook for another 5 minutes at high pressure, release.  Serve!

Fresh Roasted Tomato Basil Soup

Fresh Roasted Tomato Basil Soup

I made this in my pressure pot, you could use a crock pot or stove top, just adjust it accordingly.

3 lbs fresh roma tomatoes, sliced

1 med sweet onion, chopped

Olive oil

Garlic, I used about 8 cloves sliced

Basil Vitality Oil (Get some here)

Sea Salt

Pepper

6 cups stock (I make my own)

Slice tomatoes and garlic and place into a bowl, sprinkle with sea salt, pepper and 2 Tbl olive oil, stir well. Spread onto a baking pan and roast at 400 degrees until a few of the edges get browned.

Chop a medium onion and saute in the pressure pot just until tender, add 6 cups broth, add roasted tomatoes and garlic, add 2 drops Young Living Basil Vitality oil.  (get some here)

Cook for 12 minutes in the pressure pot, let it release naturally.  To serve use a soup ladle and put approx 1-2 cups into a blender or vita-mix and blend until smooth, pour into serving bowl and serve.  Grate fresh Parmesan if desired.


Bone Broth

Bone Broth

About once per week or at least every other week I will make an entire whole chicken in my pressure pot.  I do various things with the meat, but the bones!  Those bones!  I make what I consider “liquid gold”.

Bone broth is healthy in so many ways, great for the skin, you know the bones have collagen right? Not to mention they are jam packed with vitamins that are just plain healthy for our bones and entire body for that matter.  I’m not into the science of things, if you want to know what goodies are in bone broth, then do some research and read up on it.

My bone broth is usually made with tons of added vegetables, usually whatever I have.  I will often through the whole entire onion in there, carrots with the tops, celery with the tops and root(just cut the entire stalk in half and throw it in) a handful of cilantro or parsley, a whole garlic bulb root and all and just about any spices I like.  Now you know this all gets filtered out in the end, so it doesn’t matter to cut and fix it all pretty.  I often through the neck and gizzards or liver in there as well, wrap it in a cheese cloth if the thought just grosses you out. Remove it and throw it away when it’s finished cooking, I don’t care, it’s great for added flavor and great healthy benefits, again read up on organ meats, I don’t get into the science of all that, I just know it’s good for you.

I usually just set my pressure pot on a long soup cycle and let it do it’s thing.  Once it has pressured down, I filter the broth through a sieve or cheese cloth and put it into glass jars.

I leave quite a good air space on top because I will usually freeze it, and you don’t want a broken glass container in the freezer.  I have it handy to use for my morning warm cup of broth, to cook rice, making   soups, and just about anything that uses a liquid

.

Wheat Free Bread

Keep scrolling down, I have revised this in a few different ways, all were good, so I felt to post them all.

While some may or may not consider Flax seed a grain, I find that this bread alternative is pretty good!  In order to keep flour out of the diet and still enjoy bread I am going to say this recipe is PALEO friendly.

2 cups almond flour

6 Tbl arrowroot starch

4 Tbl Golden flax seed meal

2 Tbl tapioca starch

3/4 tsp sea salt

3/4 tsp organic baking soda

4 Tbl Ghee, coconut oil or olive oil

4 large free range eggs

1/2 cup milk (use whatever type you are allowed per your body and diet)

1 1/2 tsp Braggs apple cider vinegar

Preheat oven to 350 degrees, grease a 8 1/2 x 4 1/2 inch loaf pan

Whisk together dry ingredients, pour into a sifter and sift into a bowl.  Anything left in the sifter I press through with a pastry  brush.  You will have some flax seed hulls left and I dumped them into the dry ingredients and whisked them again.

Whisk the eggs together and then add the wet ingredients and whisk again.

Add the wet to the dry careful not to mix too much.

Pour the batter into the greased pan and bake 40 – 45 minutes.

Cool on a wire rack and refrigerate any unused bread up to 5 days.

***Variation #1

I followed the above directions except for this:

Coconut oil instead of Ghee

Use only egg whites and whip until frothy.  I used a hand whip. Fold into mixture gently.

My reasoning for the change was this. Egg whites hold more air, yolks make baked goods more dense. The Ghee made a buttery tasting bread, which was fine,  but at times I don’t want my bread to taste buttery.  This was a lighter,  fluffier consistency, lighter in color as well. Both of them were good, play with them and decide for yourself.

2 cups almond flour

6 Tbl arrowroot starch

4 Tbl Golden flax seed meal

2 Tbl tapioca starch

3/4 tsp sea salt

3/4 tsp organic baking soda

4 Tbl coconut oil

4 large free range egg whites

1/2 cup milk (use whatever type you are allowed per your body and diet)

1 1/2 tsp Braggs apple cider vinegar

Preheat oven to 350 degrees, grease a 8 1/2 x 4 1/2 inch loaf pan

Whisk together dry ingredients, pour into a sifter and sift into a bowl.  Anything left in the sifter I press through with a pastry  brush.  You will have some flax seed hulls left and I dumped them into the dry ingredients and whisked them again.

Whisk the eggs together and then add the wet ingredients and whisk again.

Add the wet to the dry careful not to mix too much.

Pour the batter into the greased pan and bake 40 – 45 minutes.

Cool on a wire rack and refrigerate any unused bread up to 5 days.

Here are some pictures of the actual bread. Notice that is has some nice air holes in it.

Variaation #2
Variation #2

**Variation #2

For this one I doubled the ingredients so I could yield a larger loaf.  The smaller loafs were not lasting very long and I was baking one 3-4 times a week.  The others were good, but small for using as a sandwich loaf.

I prefer just using the egg whites over the entire egg, which I feel makes a lighter loaf, whisking them until frothy and adding them in last.  This time I chose to use olive oil as well. In addition I ADDED 1 TABLESPOON OF HONEY to this batch, decreased the temperature to 325 degrees and I baked it for 50 minutes, covering and baking for an additional 15 minutes. I did this because the crust was getting to a nice golden brown I removed it and covered completely with foil to prevent the top from burning, returned it quickly to the oven and baked an additional 15 minutes.  To make sure it’s done, insert a knife, making sure it comes out clean.  Cool completely before slicing.  Refrigerate, covered tightly for up to 5 days, if it lasts that long.  I live in the South where we are hot and humid, in drier climates you may not need to refrigerate.

4 cups almond flour

1 cup arrowroot starch

2/3 cup Golden flax seed meal

1/3 cup tapioca starch

1 1/2 tsp sea salt

1 1/2 tsp organic baking soda

1/3 cup olive oil

1 Tbl honey

8 large free range egg whites

1 cup milk (use whatever type you are allowed per your body and diet)

3 tsp Braggs apple cider vinegar

Preheat oven to 325 degrees, grease a 8 1/2 x 4 1/2 inch loaf pan

Whisk together dry ingredients, pour into a sifter and sift into a bowl.  Anything left in the sifter I press through with a pastry  brush.  You will have some flax seed hulls left and I dumped them into the dry ingredients and whisked them again.

Whisk the eggs together and then add the wet ingredients and whisk again.

Add the wet to the dry careful not to mix too much.

Pour the batter into the greased pan and bake 50 minutes.  Remove and cover to prevent top from browning too much if needed and return to oven another 15 minutes.

Cool completely on a wire rack before slicing and refrigerate any unused bread up to 5 days.


Variation #2

Creamy Dairy Free Dip

Creamy Dairy Free Dip

This dip is made from Cashews, yep, you heard me right, cashews and oh so delicious!  I’ve made garlic dip, french onion dip, ranch dip and so many others from this one basic recipe.

1 cup raw unsalted cashews soaked at least 8 hours and drained

1 tsp organic apple cider vinegar, I use Bragg

3 Tbl fresh lemon juice

pinch of sea salt

Cover cashews with 1 inch of water in a bowl and soak for about 8 hours

Drain and rinse

Place all the ingredients into a food processor and blend until smooth and creamy.  Water may be added for desired consistency.  I used my Vita-mix blender to make mine.

Store refrigerated up to one week.  Great to go with one of my cracker recipes. Almond flour cracker recipe.

I add chives, spices, spice mixes like ranch or Italian, whatever  it is I am wanting.

Here it is plain right after I mixed it.

I have used in plain in place of sour cream on tacos and 7 layer bean dip, no one ever knows, yes it’s that good!!

Almond Flour Crackers

Almond Flour Crackers

1 large free range chicken egg

1/4 tsp sea salt

1 tsp baking powder

1/2 tsp freshly ground black pepper

1 3/4 to 2 cups blanched almond flour

***1 – 2 tsp onion powder or rosemary or garlic or dill or red pepper flakes or any combo of those to make the desired taste of cracker you like.  More ideas are below.

Preheat oven to 350 degrees

Whisk egg, salt, pepper and any other spices you desire.  Add everything to a food processor as well as the almond flour and mix until incorporated into a dough.

Place dough on parchment paper and roll out to the desired thickness, thinner for a crisper cracker.  Use a pizza cutter or decorative wheel to cut into squares.  Take a fork and insert a few times into each square to make holes, this adds air and makes crackers more crisp.  Sprinkle tops lightly with sea salt, garlic powder or other spices

Bake for approx 14 to 16 minutes until light golden brown.  If the edges are a bit more brown, remove the crackers on the edge first and return the others to the oven to brown a bit more on the edges.

Cool completely and transfer to an airtight container.  Goes great with my creamy cashew dip!!

A FEW MORE FLAVOR IDEAS:

Add 1/4 tsp mustard powder, a dash of Tabasco, a pinch of cayenne and 1 cup of finely grated cheese for a spicy cheese cracker.

For extra spicy add 1 1/2 tsp curry powder, 1/4 tsp Siracha, Tabasco or Frank’s Red Hot.

For a cinnamon type cracker omit the black pepper and sprinkle a cinnamon-sugar mix over the top of the crackers.

Best PALEO Pizza Crust

Best PALEO Pizza Crust

I’ve tried the cauliflower crust and other nut flour crust and this one is by far MY favorite.

1/2 cup blanched organic almond flour

1/2 cup organic tapioca flour/starch

1/4 cup organic coconut flour

1 Tbl organic virgin coconut oil, melted

1 organic free range egg

1/3 cup raw whole milk, or your milk of choice like almond or cashew-UNSWEETENED

pinch of sea salt

Preheat an oven to 400 degrees

In a medium mixing bowl add ingredients and mix to remove all lumps.

I usually mix the wet ingredients and then add to the dry ingredients.  You’ll end up with a crumbly like dough, but, you can easily form it into a ball with your hands, wrap and place in the fridge if you are going to use it later.

Otherwise, you can place the ball between 2 pieces of parchment paper and roll out to desired thickness, we like our pizza crust thin and crunchy on the edges.  But, if you prefer a thicker crust, then adjust accordingly.

Bake for approximately 10 minutes directly on parchment paper placed on rack or a pizza stone or pan.  I let mine cool and have wrapped and saved them for a couple of days before using them.  When you get ready to make your pizza, top it with whatever you like and bake to your liking.

Here is what I did, sorry I forgot to take step by step pictures.

I spread a generous amount of red sauce followed by shredded mozzarella and cheddar cheese, topped with chopped mushrooms, turkey bacon and some chopped red bell pepper.  I placed this in the oven at 350 degrees for about 10 minutes, until the edges got a bit brown.